arcthrift's avatar

Halloween Fun! by Julie White

PhotoBooth1One of my favorite things at a party is when there’s a photo booth. People seem to love wearing silly things and taking pictures of themselves, no matter what the occasion. At my recent Halloween party, we decided to make our own photo booth corner. It was Harry Potter themed so I hit ARC for supplies.

We’ve got Harry himself:

PhotoBooth2

ARC actually had a brand new-in-package Harry Potter set, including the glasses and wand.

Then we’ve got Dumbledore:PhotoBooth3

This one I put together myself with a jester hat that I cut the bottom off, reading glasses and a new-in-package beard from ARC. Grand total was under $5.

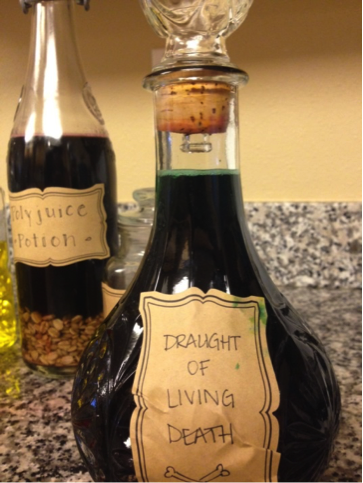
Next is Mad-Eye Moody:PhotoBooth4

I found the eye patch at ARC for 68 cents and glued on half of a plastic eyeball. (The flask belongs to a friend…) This one was my favorite because it was so simple to transform something thrifted into something new.

Last is Luna:PhotoBooth5

This was another super easy transformation; I added two pieces of vellum to these great glittery star glasses.

Other items included witches hats, brooms, graduation robes, and a sword(of Gryffindor!), as well as a homemade Wizard’s Most Wanted poster.

Finally, what Harry Potter party would be complete without a Sorting Hat?!PhotoBooth6

(Originally a “Buccaneer” hat from ARC.)

This was such a fun project to shop for and work on and people seemed to love it!

PhotoBooth7

arcthrift's avatar

It’s Halloween at arc! by Julie White

arcblog1

If you haven’t been to ARC lately, you are missing out. Halloween time is the most fun in the ARC thrift stores. There are costumes galore, wigs, accessories; everything you could possibly need for an amazing Halloween. Recently I went in not for costume purposes but for props. Some friends and I are throwing a Halloween party, which means we need decorations. One of the things we wanted to create was a set of potions bottles and jars to have around the house for a spooky atmosphere. I set out to ARC to find what we needed in the way of containers.

arcblog3arcblog2

I found all kinds of great bottles and jars perfect for potions. I bought large and small to have a variety, visually, and to have different options when deciding what to put inside. My favorite is a beautiful, vintage decanter that came with a label already on it.

arcblog4

After purchasing and cleaning all of the jars and bottles, my friends and I set about making our “potions”. We used all kinds of things inside the jars and then designed some labels to go on the front. I think they turned out amazing!

arcblog5

Some of you may notice the Harry Potter theme. We’re slightly obsessed…..

arcblog6

I hope this project inspires you to hit your local ARC thrift store and come up with a spooky Halloween project of your own!

arcblog7

arcthrift's avatar

arc Sweet arc by Julie White

I moved into a new home last summer and am just now figuring out what to put on the walls (no judgment, please). ARC has been a major resource in this venture. Not only have I found pictures and frames, but I’ve also found craft items that I’ve used to make wall art. My most recent project was this Home Sweet Home cross stitch:

ArcSweetArc_1

I found the special cross stitch fabric in a big roll at ARC for $1.99 and then I found the frame for $2.50. I started by stretching the fabric behind the frame and stapling it with a small staple gun to the edges of the frame.

ArcSweetArc_2

After it was nice and tight I counted the squares the length and width of the frame and made a plan for my embroidery using a piece of graph paper. There’s probably an easier way to do this but I went old school. After I had the design mapped out I started stitching! I used mint green embroidery floss that I had left from a previous project.

ArcSweetArc_3

When I was all done I put a wire through two of the staples so that I could hang it.

ArcSweetArc_4

Voila! This was a super easy project on a very cheap budget. I love the way it turned out and I really like how it looks next to my vintage picture of Maroon Bells (also an ARC find, of course J).

ArcSweetArc_5


arcthrift's avatar

“Happy Things” by Lorraine Espinoza

Lori E. 1


Please enjoy this wonderful poem, written by our wonderfully talented arc Ambassador, Lorraine Espinoza, entitled, “Happy Things.”

Happy Things

Beautiful dreams, I dream of unicorns in my head, just before I go to bed. These unicorns are bright, just want to say, “little one, have a good night” “little one, I want to keep you warm.” I want to make sure your blanket is not worn, and I am so glad you are born. You are an unexpected blessing, I never knew I was getting.

I wouldn’t change a thing for all the joy you bring. It is all the little things you do, that make me love you. Your beautiful face, your wonderful ideas, of the way the world should be. Climbing trees is your favorite thing to do. Fixing your scraped up knees, with a Band-Aid and a little kiss.

Always being there to protect you, that is what I wish. I wish I could do, and nobody would hurt you. Dream deep my little one, and go to sleep, and you will learn your life is very unique. You are special, in your own way; that is what everybody has got to say.

This is something I hope for you, this is something I hope you can do. Be wise and help open people’s eyes, to all the challenges in your life. Help them understand what your life is, and what your life could be. We are all the same, you and me.

arcthrift's avatar

I Love Being a Kid! by Lorraine Espinoza

Lorraine Espinoza


If you have been to our JCRS store, you will recognize our very talented arc ambassador, Lorraine Espinoza, who has brought beauty to our lives since she began working as a store greeter in 2007. Lorraine continues to spread beauty in our lives with her poetry and whether it be through her poems, or at work, this woman will warm your heart, and bring a smile to your face. Lorraine’s poem “I Love Being a Kid” brings about summer memories with gentle fathers and the memories they create.

I Love Being a Kid!

I love pie a-la-mode, but I am not very old. I am only a year; I can’t even crawl near, where the pie is.

It looks yummy to me, I want a big piece and I really don’t know what to do, because I can’t chew.

So, I am going to try to smash it, on my face.

Hopefully someone will bring a fork, because they notice I might need help.

No matter what I do, people think I am cute, especially when my dad is in his gray sports suit.

He wants to pick me up, all the time, but he never wants to get dirty. When you have babies, you are bound to get dirty.

My dad is my favorite man. He loves everything I do, and my name is Ruby Blue.

I was named after my dad’s two favorite aunts. Never got to meet them, but they are both inside you. The things you do remind me of them.

You will grow to be a wise woman, with a very busy future. I will be there, to help you, because I am your dad, and you are my little girl.

You are the apple of dad’s eye, so I never want to see you cry.


arcthrift's avatar

DIY Suitcase Shelf

arcI have been looking for a way to add more storage in my bathroom, but in a unique way. Bathroom shelving options are often boring and I definitely didn’t want that. I also didn’t want open shelves that need frequent dusting. My solution was found at arc! I was trolling the aisles a couple months ago and found this adorable vintage suitcase. It’s so small and it’s made of sturdy cardboard (versus fabric or vinyl) so I assumed it was a child’s play suitcase. But I loved the light blue/aqua color and saw a lot of potential. It was also only $5.99, which added to its appeal.

2

I’d seen bathroom shelves made from vintage suitcases on etsy before and figured I’d try my hand. I knew it would be easy enough to mount it to the wall, but I also wanted to add an additional shelf. That way I could store more inside. The first thing I had to do, though, was figure out how to cover up the peeling interior. After a lifetime of being played with, the inside was looking rough. I decided to use some pages from a vintage dictionary I bought a while ago (also from arc) and mod podged the insides. I think it turned out great!

3

After that, I used a scrap of wood and sawed it down to the correct length. It was a tight fit but I was able to wedge it inside the suitcase horizontally, and then hammered a few nails through the sides of the case and into the shelf for insurance. I thought about painting or staining the wood, but I liked the look of it as it was.

The final step was hanging it up on the wall. I had some good, strong anchors from a past project and used these to make sure that no matter how much I ended up storing inside, the suitcase would stay up on the wall. I love how it turned out! It’s been great having extra storage and I definitely like how it looks up on the wall.

4

arcthrift's avatar

How to Make Your Own Poster

My most recent project sprung out of thriftiness. I love the look of those old, vintage roll down maps and prints, but I can’t afford the ones I’ve seen online and in antique stores.

21

These were both listed on ebay for around $250, each! Wayyyy out of my price range.

I found an old poster I had laying around and decided to head to arc to see what I could find to hang it up with. I started out looking at all of the great picture frames, trying to figure out how I could get the vintage look that I wanted. I didn’t see a frame that I liked, but I did score a picture hanging kit-brand new! Not only did it have the nail and hook for the wall, it also had the wire I’d need the poster to hang from and a great bracket that I could use to mimic a pull down tab on the bottom of the poster.

arc thrift

Then I moved over to the tool area and struck gold.  I found some thin dowels that I think used to be part of a piece of furniture, I’m not sure. They were exactly what I was looking for–already stained and everything.

arc thrift
At home, I used strong tape that I already had to tape the dowels to the back of my poster on the top and bottom, and to secure the wire.

arcarc thrift colorado

Then I used a tack to attach the bracket.

arc thrift
Voila! This was so easy and thrifty, and I love how it turned out! I may need to make a few more…

arcthrift's avatar

A Festive Banner To Ring In The New Year

It is time to bring in the New Year. Why don’t we do so with a fun arc craft project? Whether you’re planning on having a big party or just staying in with a glass of champagne, you can’t go wrong with a New Year’s banner to bring in the festive spirit.

The arc carries many craft supplies and is the perfect place to start your DIY mission. The first stop to make is the textile section, where you can find many different fabric types and patterns. For my banner, I found about two yards of gold polyester with sparkles, perfect for a fun banner! The fabric cost $9.99.

arc1

The next stop I made was the craft section, where I found glitter packets for $1.99. I knew I had some spray on glue at home to use for sticking the glitter to the fabric, so I was set.

The first step is to cut out a long strip of fabric to use to hang all the other banner components on. Next cut out four large squares. I eyed mine and they turned out to be about 8 inches by 8 inches. I cut number stencils out of cardboard and used them to apply the glue and glitter. I made slits in the upper corners of the fabric panels so I could string them onto the original strip of fabric.

arc4arc5arc6arc7 The tassels are made by cutting out long strips of fabric, wrapping them around a 4 inch piece of cardboard and then tying them off. The tassels can by tied to the original strip of fabric.

arc8

I put everything together and the results are below. I can’t wait to go back to the arc New Year’s day for their 50% off sale!

arc9

arcthrift's avatar

Make A Custom Wreath For Under $20

Christmas is the best time of year for an Arc craft project. The aisles are packed with goodies and colorful, potential, craft materials. Today I wanted to show you how to take these “potential” items and turn them into a beautiful holiday adornment.

My door is lacking a cheerful Christmas wreath and I thought it would fun to make one using old wool sweaters and give an old grapevine a new life.

The first step to create a wreath is to find a form at your local Arc store. Anything can be used, but I found a lovely grapevine wreath that was begging to be up-dated. The cost of this form was $4.99.

Blog1

The next step is to find wool sweaters that are 90% to 100% pure wool. Since this is the Christmas season, I hit up all the red sections over and over again until I found the perfect sweater. I then grazed through the rest of the knits and found a lovely soft gray sweater made of merino wool and another in gold. Each of these cost $8.00, $7.00 and $5.00 respectively.

Blog2.1 Blog2.2 Blog3

When you get them home, tear off the tags and bag them in pillow cases. Toss them in the washer on high heat for your longest cycle with just a small amount of detergent. Don’t let the spin cycle run. I would do separate loads to avoid having the colors run. If you have a front loader like me, throw in a couple bouncy balls, tennis balls or a tennis shoe. Check the sweaters after the cycle and if you can’t see the knit stiches anymore you are good to go. If not, run them through again. This whole process is basically wool care blasphemy.

After felting the wool (the process above) it is time to cut the sweaters up. Cut circles and flower shapes and spirals and leaves. Just go to town and make a giant pile.

Blog7 Blog8 Blog9

Pull out your hot flue gun and put your flowers together and then glue them to your wreath form. My finished product is below. I had some fun adding a bow and mixing up the types of flowers.

Blog10

Written by Jessica, aka Colorado Momma.

arcthrift's avatar

A Thanksgiving Look That Barely Cost A Thing

I wanted to find something new for the Thanksgiving table – something for the grandkids. So, I headed to arc Thrift Store in Loveland. First I found the “pilgrim doll.” What a perfect centerpiece for the kids!

1113141334b (1)

I had seen some tea light candle holders in a magazine with frosted edging and wanted to try to make some for the holidays. The amber glasses would be perfect for what I had in mind. arc had a very large selection of wicker baskets and I found the piece I needed along with the fall floral items for the final touch. All of this for $24.61.

1113141338 (1)

1113141336a (1)

What you’ll need for the candleholders: double-faced tape, glue gun, diamond dust, Modpodge, assorted glasses (canning and jelly jars also work well), ribbon and battery-operated tea lights.

1116141518b (1)

Pour the Mod Podge into a bowl to the depth of about ½ inch. Put a generous amount of diamond dust into a second bowl and push to the center to create a mound. Dip the top of the glass into the Mod Podge and then into the diamond dust. After the first one, I realized that it wasn’t a good idea to let the top of the glass touch the bottom of the diamond dust bowl. By creating a mound, you can swirl the glass around until enough diamond dust sticks to the glass. Let the glass dry – about 20 to 30 minutes. If you want, you can repeat the process to create a thicker “snow” edge on the glass.

After the glass dries, put double-faced tape around the glass where you want the ribbon to be. I found that the ends of the ribbon required extra adhesive so I used the hot glue gun to apply glue on the ends of the ribbon. When determining where you will be placing the ribbon, leave enough space from the bottom ribbon edge and the bottom of the glass as about ¾” of diamond dust is poured into the glass. We want the diamond dust to show through. Place the battery-operated tea light inside the glass on top of the diamond dust. Caution: do not use candles. It is not safe with the diamond dust.

1117140820

Final step – arrange the candle holders and fall floral pieces around the base of the doll. And, there you have it – a new centerpiece already for Thanksgiving dinner! The shelves at arc Thrift Stores are filled with holiday items that you can use “as is” or let your imagination loose and design your very own creation. Can’t wait to get back to check out all of the Christmas possibilities.

1116141619a (2)