A Festive Banner To Ring In The New Year

It is time to bring in the New Year. Why don’t we do so with a fun arc craft project? Whether you’re planning on having a big party or just staying in with a glass of champagne, you can’t go wrong with a New Year’s banner to bring in the festive spirit.

The arc carries many craft supplies and is the perfect place to start your DIY mission. The first stop to make is the textile section, where you can find many different fabric types and patterns. For my banner, I found about two yards of gold polyester with sparkles, perfect for a fun banner! The fabric cost $9.99.

arc1

The next stop I made was the craft section, where I found glitter packets for $1.99. I knew I had some spray on glue at home to use for sticking the glitter to the fabric, so I was set.

The first step is to cut out a long strip of fabric to use to hang all the other banner components on. Next cut out four large squares. I eyed mine and they turned out to be about 8 inches by 8 inches. I cut number stencils out of cardboard and used them to apply the glue and glitter. I made slits in the upper corners of the fabric panels so I could string them onto the original strip of fabric.

arc4arc5arc6arc7 The tassels are made by cutting out long strips of fabric, wrapping them around a 4 inch piece of cardboard and then tying them off. The tassels can by tied to the original strip of fabric.

arc8

I put everything together and the results are below. I can’t wait to go back to the arc New Year’s day for their 50% off sale!

arc9

Make A Custom Wreath For Under $20

Christmas is the best time of year for an Arc craft project. The aisles are packed with goodies and colorful, potential, craft materials. Today I wanted to show you how to take these “potential” items and turn them into a beautiful holiday adornment.

My door is lacking a cheerful Christmas wreath and I thought it would fun to make one using old wool sweaters and give an old grapevine a new life.

The first step to create a wreath is to find a form at your local Arc store. Anything can be used, but I found a lovely grapevine wreath that was begging to be up-dated. The cost of this form was $4.99.

Blog1

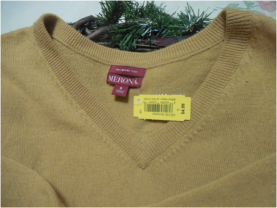
The next step is to find wool sweaters that are 90% to 100% pure wool. Since this is the Christmas season, I hit up all the red sections over and over again until I found the perfect sweater. I then grazed through the rest of the knits and found a lovely soft gray sweater made of merino wool and another in gold. Each of these cost $8.00, $7.00 and $5.00 respectively.

Blog2.1 Blog2.2 Blog3

When you get them home, tear off the tags and bag them in pillow cases. Toss them in the washer on high heat for your longest cycle with just a small amount of detergent. Don’t let the spin cycle run. I would do separate loads to avoid having the colors run. If you have a front loader like me, throw in a couple bouncy balls, tennis balls or a tennis shoe. Check the sweaters after the cycle and if you can’t see the knit stiches anymore you are good to go. If not, run them through again. This whole process is basically wool care blasphemy.

After felting the wool (the process above) it is time to cut the sweaters up. Cut circles and flower shapes and spirals and leaves. Just go to town and make a giant pile.

Blog7 Blog8 Blog9

Pull out your hot flue gun and put your flowers together and then glue them to your wreath form. My finished product is below. I had some fun adding a bow and mixing up the types of flowers.

Blog10

Written by Jessica, aka Colorado Momma.